Customising Your Cluster
CycleCloud is a powerful tool for orchestrating and managing clusters of Virtual Machines (VMs) on Azure. Whether you are planning your own infrastructure or using the new Azure CycleCloud Workspace for Slurm, there are multiple ways to deploy and configure CycleCloud.
After deploying your CycleCloud host and creating a cluster using one of the built-in templates, you might wonder what’s next. While these templates provide a functioning scheduler and compute nodes, the compute nodes typically will only have a base operating system, often one of the Azure HPC images, with no further customisation or software installed.
Unlike on premises clusters, where the physical servers in a cluster may remain the same for an extended period of time, the nodes in a CycleCloud cluster are flexible and are created and deleted as needed. This means that any changes made while a node is live will be lost the next time a node is created.
 You could create scripts that run before each workflow that configures the worker node. This would be extremely time consuming and an inefficient use of the resources (If you take an hour to compile and install software that is an extra hour per job you are being charged! That will add up quickly).
CycleCloud provides three methods for customising and configuring worker nodes for your workloads and workflows. Each method has its unique advantages and disadvantages, so the best choice depends on your specific needs and workflow:
1. Custom images:
Advantages: Allows you to pre-install software and configurations, ensuring that every node is set up from the start.
Disadvantages: Creating and maintaining custom images can be time consuming, especially for an ever-evolving software stack.
2. Cloud-init:
Advantages: Offers a way to run scripts (that you may already use elsewhere in your
organisation) and configure instances at boot time, making it flexible and easy to update.
Disadvantages: Acts before any cluster specific setup has occurred, has its own format to learn, and has some limitations within CycleCloud clusters.
3. CycleCloud projects and cluster-init:
Advantages: Offers a structured way to manage and deploy (scripts, blobs, and files) to a
cluster using common tools such as BASH and Python scripts.
Disadvantages: Requires familiarity with how CycleCloud projects interact with the cluster.
In this blog, I’ll explore how to make the most of these options, turning a generic CycleCloud cluster into a CycleCloud cluster ready to run your optimised workflows.
How do customisations get applied to a cluster?
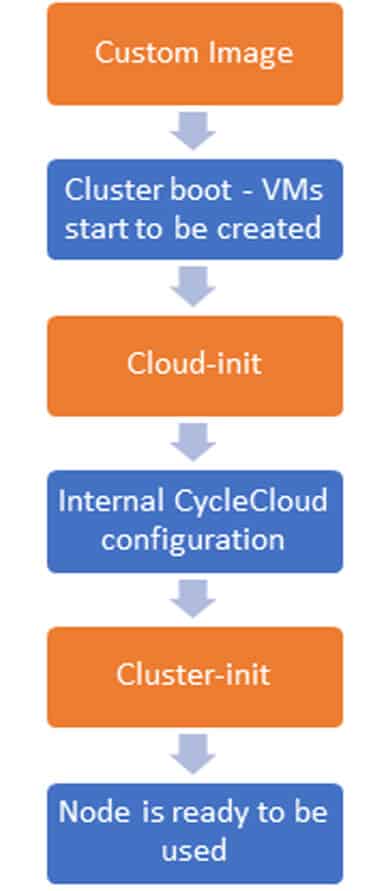
The three customisation methods apply at distinct stages of the overall cluster configuration.
This flow chart illustrates the CycleCloud cluster boot sequence and at what stages the customisations are applied.
Using custom images
Before you turn on your cluster, you can add customisation through the use of custom images for cluster nodes; this can be one image for all or a separate image for each node type. For example, you may want a different image for GPU vs non-GPU VM types.
Customising the image can be done in many ways, the simplest is creating a VM and hand modifying it then imaging. Other options include using tool such as Ansible, CI/CD pipelines, Packer, and the Azure image builder.
Deciding what to include (or not include) in your custom image is open for debate among the HPC community. Try following these guiding principles when choosing what to include or exclude:
- Is it something you want on all cluster nodes, scheduler, compute, and login? this may be a good candidate for being included.
- Does the item/config take a long time to install/set up? If yes, this is a perfect thing to include in the image. (VMs are charged from the moment they are created, any time spent configuring at boot is still charged at the standard rate for that VM).
- Are you running in a locked-down network? Consider what can or cannot be customised without internet access.
- Do you or your organisation want to tightly control the version of the included item? If yes, images offer a way to ensure that every VM has the same version of a package, installed the same at boot every time.
- Is the item/config to be included going to change often? If yes, this may not be best to be included as the image will need to be updated for each change.
- Is the item/config something that cannot be set up using a script? If yes, including this in the image would be the only reliable way for this to be setup on the cluster.
Balancing the time it takes for included items to be installed is crucial. No one wants a compute node that takes 20 minutes to boot before running a job that could only take 20 minutes itself.
Image maintenance and best practice is a wide topic with lots of views and opinions so we won’t discuss it here, but a quick search will turn up plenty of resources on how to maintain your golden images.
To enable your custom images in the cluster, you can either add their image ID to the cluster through the GUI or modify the cluster template before creating the cluster. Documentation on this can be found here.
Cloud-init
After customising your image and pressing the start cluster button, Cloud-init runs any configured scripts once the VM is created. Cloud-init runs any scripts that have been configured.
Cloud-init is a free tool developed by Canonical to simplify the customization of cloud instances using either its own format “cloud-config,” bash scripts, or a few other scripting languages. Most cloud VM images come with Cloud-init pre-installed, this allows you to automate the initialisation of a cloud VM in an efficient, consistent, and cross-platform manner.
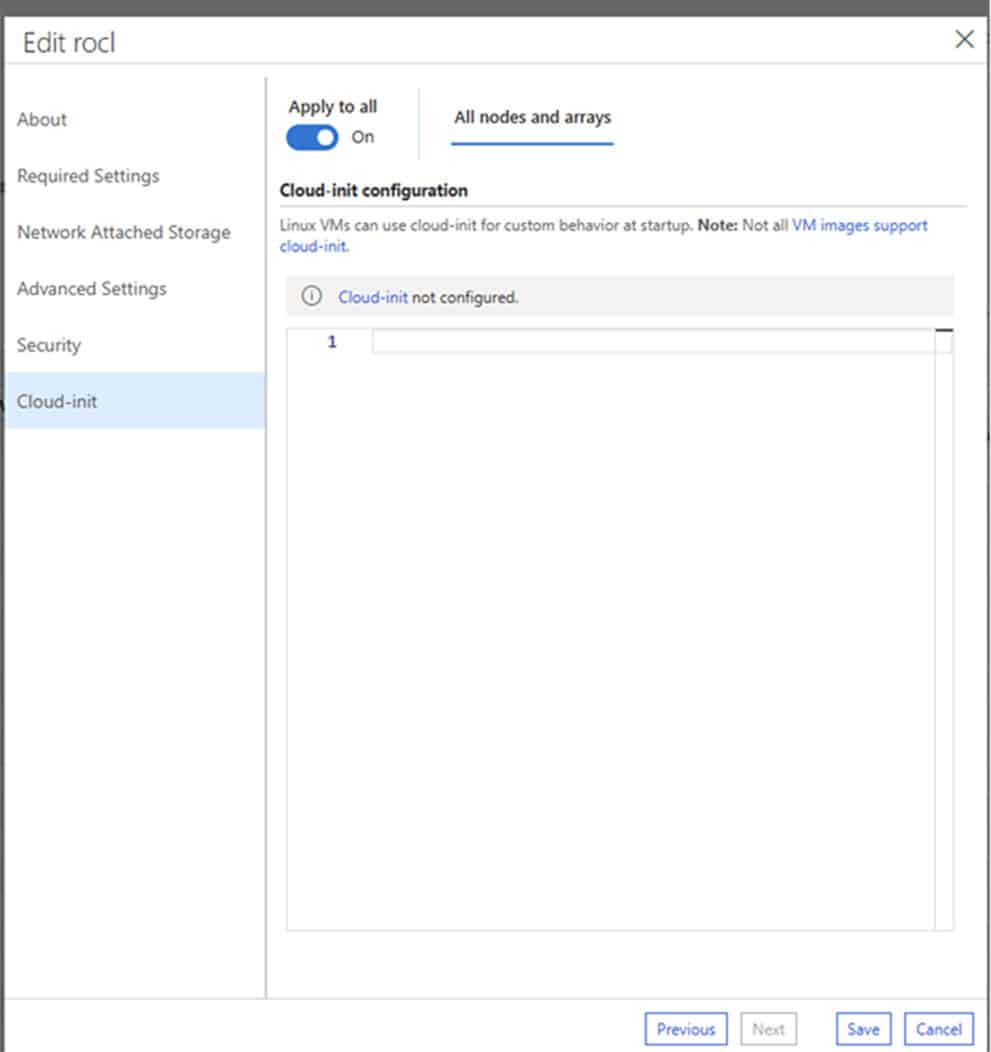
Using the CycleCloud GUI (or baking the scripts into the cluster template) you can enter Cloud-init scripts that get run on the cluster nodes at boot (Not all OS types are supported; details on support are in Azure documentation).
Cloud-init runs at VM boot and therefore no CycleCloud-specific configuration has yet taken place, this makes it the perfect place to apply changes such as proxy configuration to allow internet access.
The strengths of Cloud-init include:
- Pre-existing Scripts: If you already have Cloud-init scripts developed for your organization, you can reuse them here.
- Early Configuration: Ideal for changes needed before CycleCloud-specific configuration.
CycleCloud has specific documentation on using Cloud-init here.
Cluster-Init and CycleCloud projects
 Cluster-Init is a stage in the node boot process where CycleCloud runs any projects that have been added to that node type. The scripts are run and managed by a tool called Jetpack.
An example of this is the CycleCloud-Slurm project. If you used the included Slurm template the nodes in the cluster have the CycleCloud-Slurm project added to them and this project does all the setup of Slurm on the nodes.
Some examples of CycleCloud Projects are:
- CycleCloud-Slurm: This project installs and configures Slurm in your cluster, if you are using the included Slurm template you are also using this project. As CycleCloud projects go this is quite a complex one but is a good reference when looking at what is possible using cluster init.
- CycleCloud-nfs: This project installs and configures a NFS file system. This is a useful example of a simpler CycleCloud project.
There are a wide range of CycleCloud projects published by Azure on the Azure GitHub.
What is a CycleCloud project?
A CycleCloud project is a collection of specs which contain scripts and files that can be used to configure any node in a cluster.
Specs are the different types of nodes (or configurations) you have. For example, you could have a spec called compute which would be applied to all compute nodes, or a spec called LDAP applied to all cluster nodes which would configure LDAP.
Projects follow a specific structure, and this can be created for you using the CycleCloud CLI command <cyclecloud project init ProjectName>. Documentation on this is available here.
How to use a CycleCloud project?
Using a CycleCloud project consist of two phases. First, you have to create your project, its specs, scripts, and files. Second, you add the project to the cluster.
Within your project specs you will have a scripts, files, and test folders. These function as:
- Scripts: Contains your script files to be run. These are executed in lexicographical order, so it is useful to number them e.g. 01_script.sh. All scripts are run with root privileges.
- Files: Contains any files that you want on the node. E.g. a sssd.conf file or even another script to be executed.
- Tests: Contains tests that can be run when running the cluster in testing mode.
Your project files will be found on the cluster nodes at
/mnt/cluster-init/{project_name}/{spec for this node}/{scripts|files|tests}
CycleCloud projects also support chef cookbooks, however, I won’t cover this today. Documentation on this is available here.
Jetpack will run these scripts, log output and return any error codes to the CycleCloud server and GUI.
Once you have created your scripts, you need to upload the project to your cluster using the command
cylecloud project upload <locker-name>
This can then either be baked into the cluster template or can be added on the fly through the GUI.
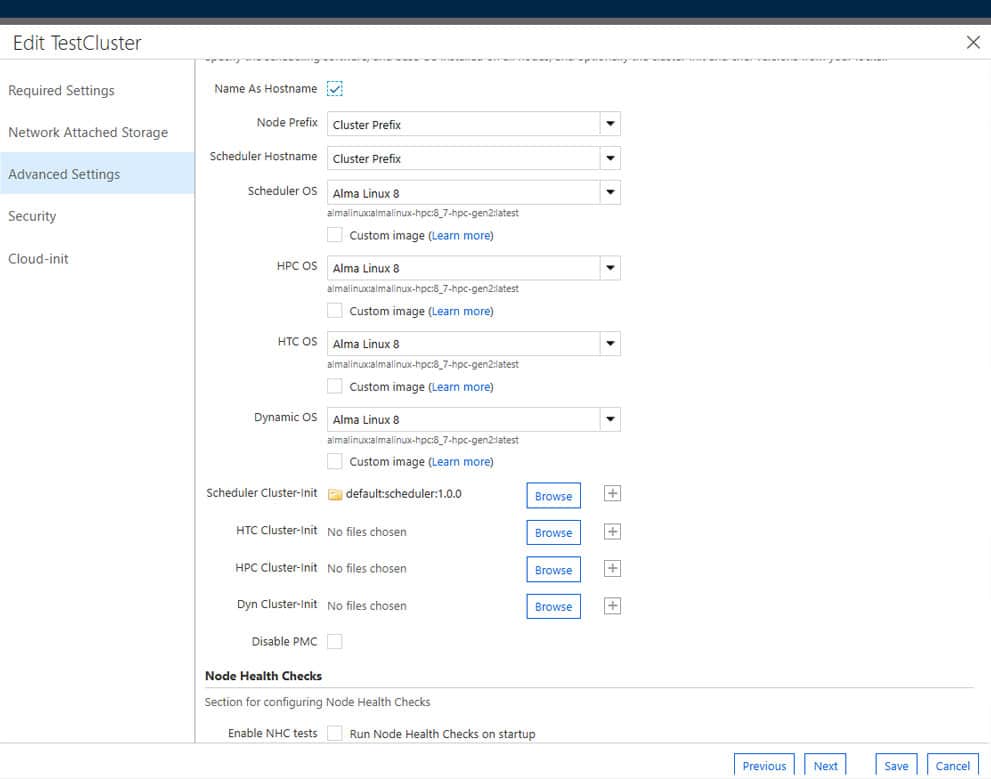 Both methods achieve the same result but using the GUI allows projects to be added and removed without updating the underlying cluster templates. If you are using the built-in Slurm template you can find this option under Advanced Settings, Cluster-Init.
If you are adding the project directly to the template you can use two different formats, details on this are here.
Useful information for when creating your project
 When writing your scripts you can take advantage of jetpack, in particular the command
jetpack config
can provide you with an extensive list (Over 2500 values on a basic cluster!) of configuration settings. The configuration settings consist of all VM details as gathered by Chef Ohai, parameters defined in the CycleCloud template, and CycleCloud cluster information. Using these values in your scripts allows you a lot of flexibility in scripting and provides a reliable source for node details.
Jetpack config values are also useful in production when you want to quickly gather all the details on how a node was configured.
In addition to the over 2500 jetpack config values there are some less well documented environment variables that can help you out in scripts:
- CYCLECLOUD_SPEC_NAME = Name of the spec being run
- CYCLECLOUD_HOME = Jetpack location normally /opt/cycle/jetpack
- CYCLECLOUD_SPEC_PATH = path to the currently running spec e.g. /mnt/cluster-init/<project_name>/<spec_name>
- CYCLECLOUD_PROJECT_NAME = Name of the currently running project
- CYCLECLOUD_PROJECT_PATH = Path to the currently running project
Summary
With three different methods for customising your cluster nodes, it can be challenging to know where to put each customisation. A combination of custom images and CycleCloud projects provide a flexible and full featured way of customising anything needed. Cloud-init works well but does have some limitations for complete cluster customisation.
Customisation of your cluster is a key step in making the most out of your Cloud HPC and can be the difference between the success and failure of a production service.
At Red Oak Consulting, we have a wealth of expertise in CycleCloud to help you get your cluster to a production-ready state. Reach out on sales@redoakconsulting.co.uk or James.Page@redoakconsulting.co.uk and see what we can do for you and your HPC needs.

James Page
Lead Consultant
Red Oak Consulting